WaveDisco Studio is a free browser-based mastering tool built specifically for AI-generated music. No installation, no account, no payment required. Open it, drop your track, get a processed file back.
This guide covers everything — what each mode does, what the controls mean, and how to get the best result from your Suno or Udio track.
Open the studio: wavedisco.com/studio
The five tabs
The studio has five tabs across the top: Master, Analyze, DJ, Record, Export.
Most people need Master and Export. The others are there when you want more.
Master tab — three modes
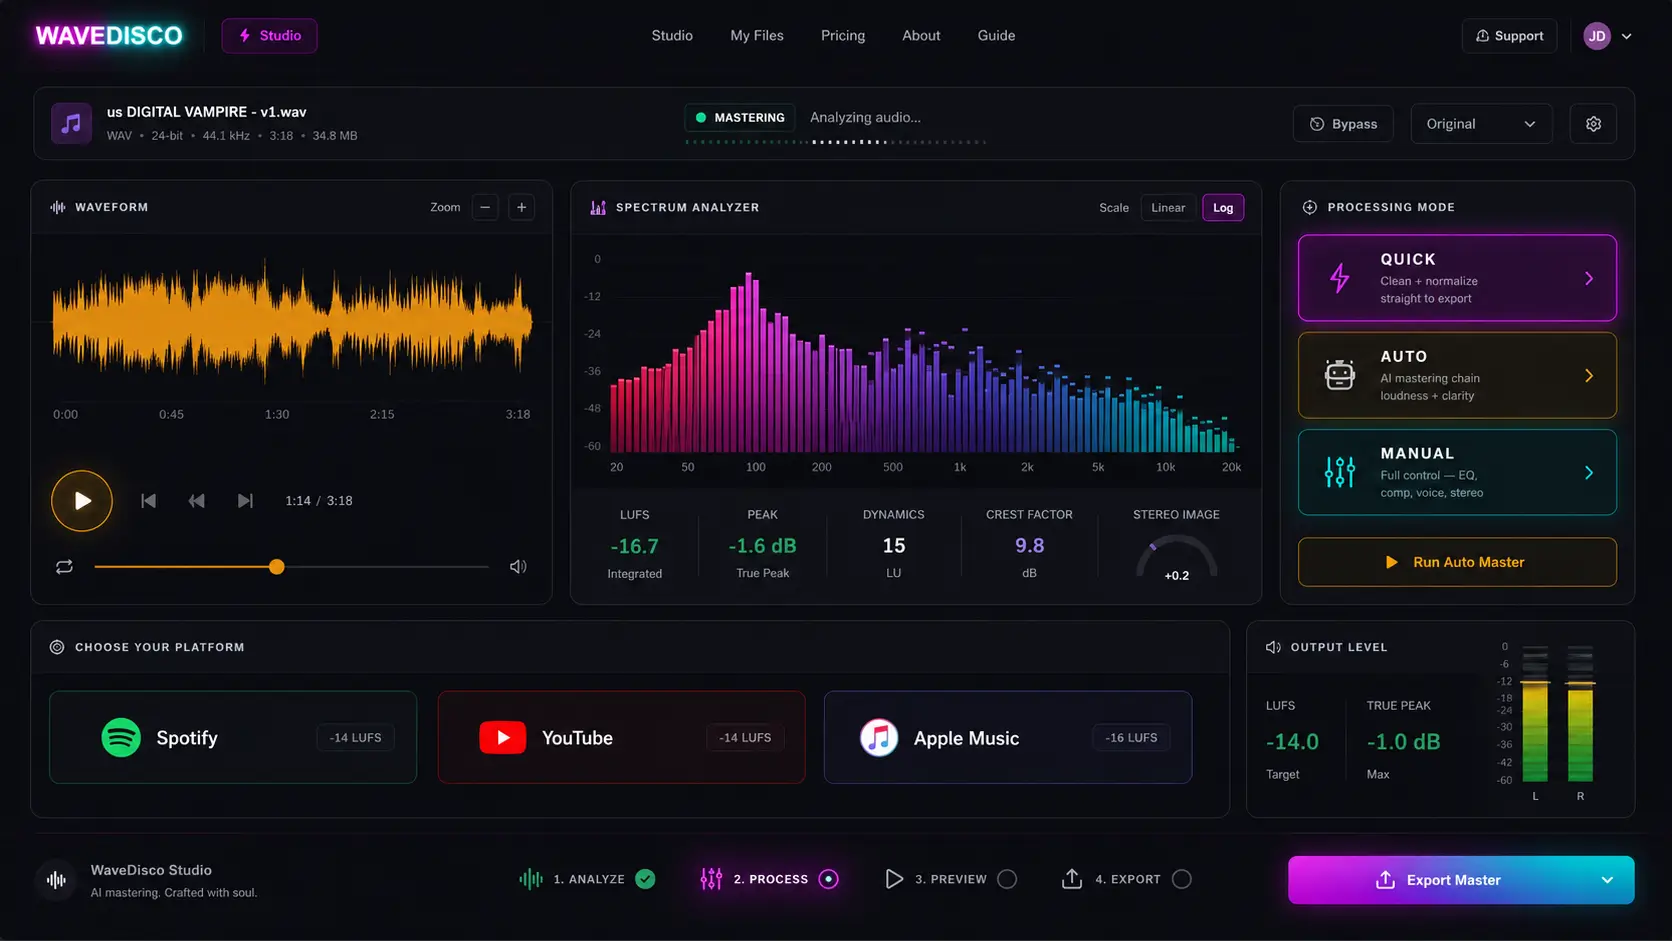
This is where the processing happens. You choose one of three modes depending on how much control you want.
Quick — one click, done
Drop your track. Click Quick. Done.
Quick applies a fixed processing chain: a high-pass filter that removes low-frequency rumble below 30 Hz, and a true peak limiter set to -1 dBTP. The PRISM DSP engine handles the rest — normalizing loudness to your target platform, typically in under 2 seconds.
Use Quick when: you trust the defaults, you're in a hurry, or the track just needs basic cleanup.
Auto-Master — automatic but controllable
Auto-Master analyzes your track first — loudness, dynamics, spectral balance, stereo width — then builds a processing chain based on what it finds.
Two things you control:
Genre — the studio detects it automatically from the audio spectrum, but you can override. Seven options: Electronic, Pop, Hip-Hop, Rock, Jazz, Classical, Acoustic. Electronic is the default for most AI music and works well for Suno and Udio output.
Strength — Subtle, Balanced, or Bold. This scales all processing parameters up or down. Balanced works for most tracks. Bold can over-compress complex material — if the result sounds squashed, drop to Subtle.
Platform — Spotify, YouTube, Apple Music, or Club/DJ. This sets the target LUFS. Spotify and YouTube both target -14 LUFS. Apple Music targets -16 LUFS. Club/DJ targets -9 LUFS for louder playback environments.
Auto-Master runs through the same PRISM DSP engine as Quick, with genre-aware processing added.
Manual — full control
Manual mode exposes the complete processing chain. Every module is adjustable. This is for people who know what they want and want to get there precisely.
The signal flows through these modules in order: high-pass filter → 8-band EQ → tape saturation → parallel compressor → de-esser → de-harsh → voice fix → limiter → stereo widening → reverb.
Each module can be adjusted independently. The spectrum analyzer and EQ curve update in real time so you can see what you're doing while you do it.
Analyze tab — understand your track before touching it
Before you process anything, the Analyze tab shows you what you're working with:
- Integrated LUFS — how loud the track is overall
- True Peak — the highest peak in dBFS
- Dynamic Range — how much variation exists between loud and quiet moments
- Stereo Width — how wide the stereo image is (0% = mono, 100% = full stereo)
- Spectral balance — how energy is distributed across Low, Mid, High, and Air frequencies
- Overload percentage — what fraction of samples exceed 0 dBFS
The Mud and Harsh readings tell you specifically whether the low-mids are cluttered or the high-mids are aggressive. These are the two most common problems in AI-generated music.
Read the analyzer before choosing your mode. If Mud is high — use Manual and cut around 200–350 Hz before processing. If the track looks clean — Quick or Auto-Master will handle it fine.
DJ tab — mix and export
The DJ tab has nothing to do with mastering. It's a separate set of tools for creative use:
Echo adds a delay effect with adjustable feedback. Reverse flips the track or a section. Hot Cue marks points you want to jump to. Loop repeats a section.
Export DJ Mix saves your session as a 24-bit WAV — the same quality as the master export.
Record tab — microphone input
Record tab captures audio from your microphone with a vocal processing mode. Useful if you want to record something on top of an AI track, or record vocals separately for processing.
Export tab — final output
When you're happy with the result, Export gives you format options:
Default export: 24-bit stereo WAV. This is the right format for streaming platform upload — maximum quality, no lossy compression.
16-bit option available for smaller file size if needed.
The exported file includes embedded metadata: track name, artist, genre, processing information, and an automatically generated cover image.
The processing engine
The Quick and Auto-Master modes use the PRISM DSP engine — the same engine that powers the PRISM Master desktop application. It runs in a background thread so the interface stays responsive while your track is processing.
Manual mode uses the browser's audio processing layer, which gives you real-time feedback as you adjust controls.
Common questions
Does it work on phone? The studio opens on mobile but the Manual mode is designed for desktop use. Quick and Auto-Master work fine on any device.
What file formats does it accept? MP3, WAV, and FLAC.
Is there a file size limit? No hard limit, but very large files may take longer to analyze.
Does it store my audio? No. Processing happens in your browser. Your audio never leaves your device.
Start here
If you've never used WaveDisco Studio before:
- Open wavedisco.com/studio
- Drop your Suno or Udio track onto the upload area
- Go to the Analyze tab — look at the LUFS and Mud readings
- Come back to Master — choose Auto-Master, set your platform, click process
- Go to Export — download your 24-bit WAV
- Upload to Spotify, YouTube, or wherever you're releasing
That's the full workflow. Come try it — it's free and takes about 2 minutes.
Related: What Is LUFS · How to Fix Clipping · AI Music Mastering Guide